sam witte
- [ home ]
- [ resume ]
- Hardware
- Software & Code
- APIs
- Display Initialization
- A Display Problem
- The Math
- Final Thoughts
- a Raspberry Pi Zero W
- (2) Adafruit 14-segment displays with I²C boards
- Improving troubleshooting skills
- Completing a project from start to finish
- Using GitHub (pushing, committing, and using the desktop application)
- I²C interfacing
- Python and Python libraries
- Working with
sshcommands and hardware through the command line
Cryptocurrency Counter
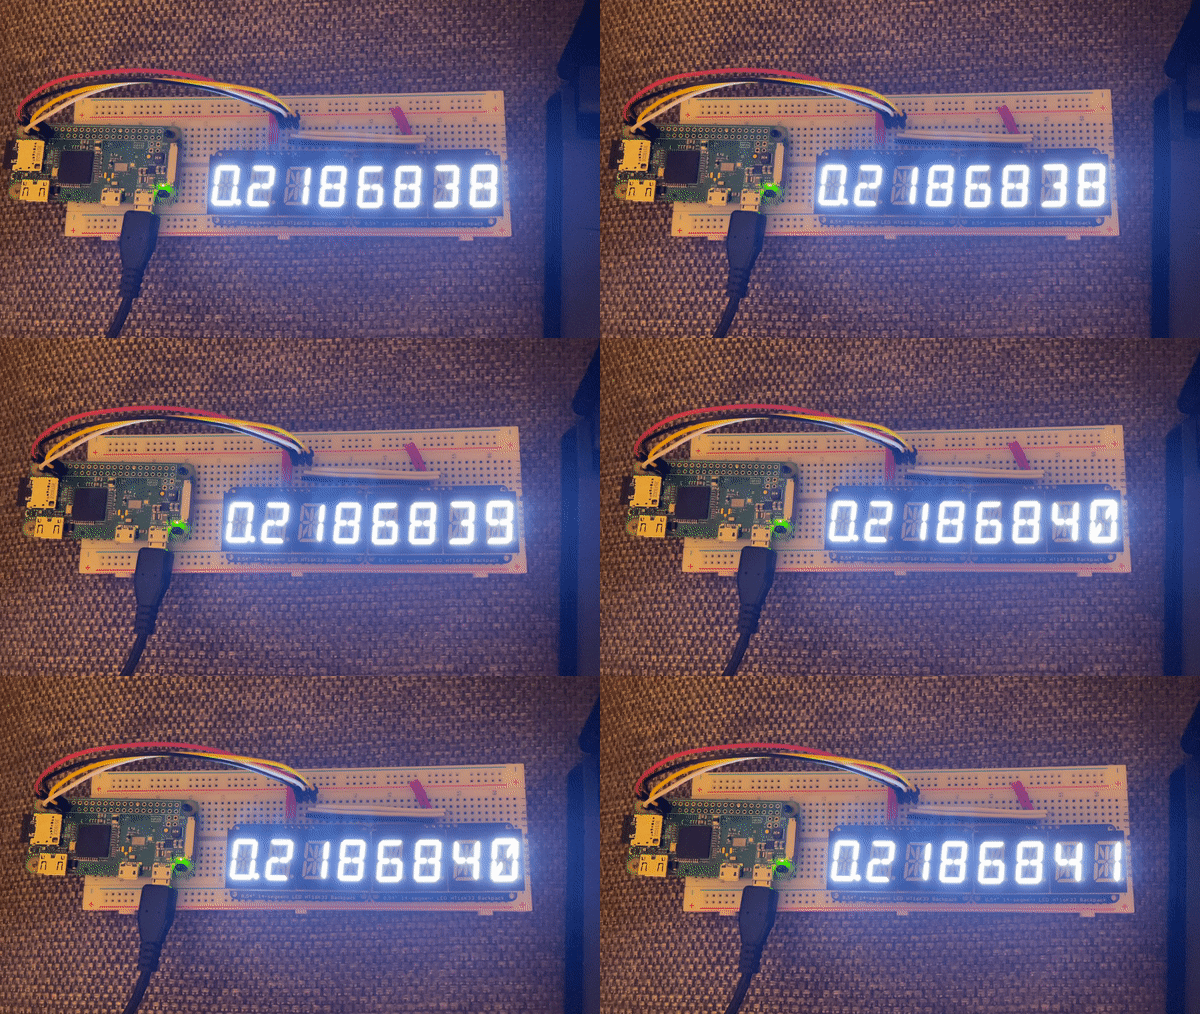
Utilizing 14-segment displays, a Raspberry Pi, APIs, and a 3D-printed enclosure, this Python-powered box provides me with a real-time estimate of how much cryptocurrency I'm mining.
Summary / Table of Contents
This is what I would say was my first real project. By that, I mean something with a real goal, purpose, and way to get there. When I began thinking about how to make this, I knew that it needed to be both wireless, as well as provide real-time estimates on how much cryptocurrency I was mining.

Table of Contents
Hardware
For this project, I used:
Software & Code
Before this project, I hardly knew any Python. Enough to print "Hello World" in the console, but not much more than that. Throughout this project, I learned how to use various APIs, define and call functions, and use libraries to interface with GPIO pins on the Raspberry Pi.
APIs
For this project, I used mainly the CoinGecko and Ethermine APIs. I also used Infura to grab my wallet's balance off of the Ethereum blockchain. This was my first time utilizing any API, so I had to figure some things out, like how to call functions from them. Turns out it's pretty simple.
I decided to use CoinGecko to get coin prices because it was free to use, had no keys, and had easy-to-understand documentation.
All you need to do to get the price of, for example, Ethereum, you just need to use:
price = cg.get_price(ids='ethereum', vs_currencies='usd')
price_rvn = cg.get_price(ids='ravencoin', vs_currencies='usd')
There's a whole list of other currencies that you can get with help from their documentation, but that's all we should need for now.
Display Initialization
The 14-segment displays interface through I²C. First, we need to create the interface using:
i2c = busio.I2C(board.SCL, board.SDA)Next, we need to create the display within the script. For that, we use:
displayL = Seg14x4(i2c, address=0x71)
displayR = Seg14x4(i2c, address=0x70)
Notice we need to create two displays - left and right. This is because we can only create a single (14 segment) x (4 character) display at a time. Using I²C, we can connect multiple displays at a time. To use more than one display over the same I²C bus, there are assignable IDs on the back of the board. In this case, I used 0x70 and 0x71. It doesn't matter what you use as long as you know the IDs. To set the ID, you simply solder the pads on the back with the ID you want.
Next, we want to clear the display. Just fill the display with nothing:
displayL.fill(0)
displayR.fill(0)
To finish initializing the display, let's set the brightness, which can be any value from 0.0 to 1.0:
displayL.brightness = 1.0
displayR.brightness = 1.0
Now, the display is initialized, and we can display any 8 characters we want using:
displayL[0-3] = [character] or displayR[0-3] = [character]
A Display Problem
One particularly simple yet tough problem I had to solve was getting the first segmented display to show a decimal with the number. I didn't want to hard-code in the value for it, as that wouldn't be very flexible. Instead, I created a dictionary with every digit, 0-9, and bitwise-or added the decimal. Each segment on the display has its own bit. So, to display a 0 with a decimal place, I would send the binary corresponding to the segments I wanted to light up.
The Math
Now that everything is initialized, we can get into the math. Ethermine provides the user with data points like current unpaid balance, average hashrate, and average coins per minute.
Using these, I figured out the amount of time it took to mine 0.00000001 (1 one-hundred-millionth) ETH, the smallest amount the display can output, and updated the display once per that amount of time.
First, update the stats variable. Then, using the API-provided coinsPerMin attribute, we can calculate the time it takes to mine 0.00000001 ETH, say x, and update the display every x seconds.
stats = ethermine.miner_current_stats(address)
global coinsPerSec
global secPerCoin
coinsPerSec = stats['coinsPerMin'] / 60.0
secPerCoin = 0.00000001 / coinsPerSec
Final Thoughts
Reflecting on what I learned throughout this project:
Throughout this project, I developed and improved many valuable skills, including:
Overall, it was a great project that allowed me to improve on many skills, while connecting two areas I'm passionate about — cryptocurrency and electronics.